Chicken Brooder Setup: The Complete Guide for Baby Chicks
Set up a chicken brooder the right way: box options, brooder plate vs heat lamp, temperature chart, bedding, and space requirements for baby chicks.
Researched from university extension, USDA, and veterinary sources. How we research.
Chicken Brooder Setup: The Complete Guide for Baby Chicks
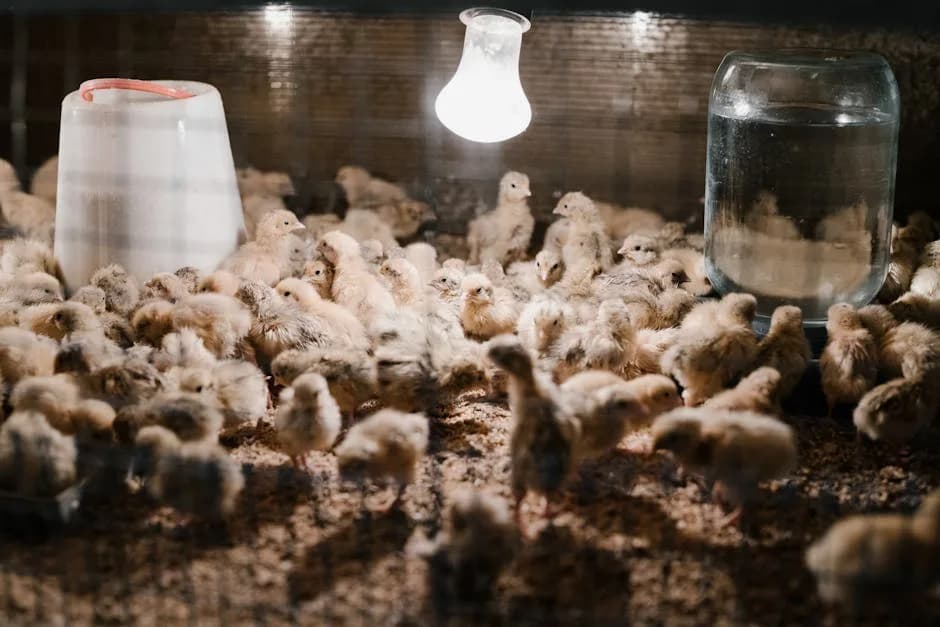
A chicken brooder is just a warm, safe box that stands in for a mother hen. That's it. But get the details wrong, too cold, too crowded, the wrong bedding, and you'll lose chicks in the first week. Get them right and brooding is honestly one of the easiest parts of keeping chickens.
I've brooded chicks in plastic totes, stock tanks, and a converted dog crate. This guide covers everything I wish someone had handed me before my first batch: what to use for the box, how to heat it, exact temperatures, and the mistakes that cost beginners chicks.
Quick Answer: A brooder needs four things: a draft-free container with 0.5 square feet per chick (1 square foot after week 4), a heat source holding 95F in week one and dropping 5 degrees each week, absorbent bedding like pine shavings, and chick-sized feed and water stations placed away from the heat. Set it up and test it 24 hours before chicks arrive.
| Brooder Element | What You Need |
|---|---|
| Container | Plastic tote, stock tank, or DIY box, 12+ inch walls |
| Space | 0.5 sq ft per chick (weeks 1-4), 1 sq ft (weeks 4-8) |
| Heat | Brooder plate (safest) or secured 250W heat lamp |
| Temperature | 95F week 1, minus 5 degrees each week |
| Bedding | 2-3 inches pine shavings (never cedar or newspaper) |
| Feed & water | Chick starter in a chick feeder, shallow waterer |
| Time in brooder | 6-8 weeks, until fully feathered |
What You'll Learn
- •What a brooder is and why chicks need one
- •Brooder box options compared
- •How much space chicks need
- •Brooder plate vs heat lamp
- •The week-by-week temperature chart
- •Bedding that works (and bedding that kills)
- •Feeder and waterer setup
- •Where to put the brooder
- •Step-by-step setup checklist
- •Reading chick behavior
- •Common mistakes
- •FAQ
What Is a Chicken Brooder?
A brooder is any enclosed, heated space where chicks live from hatch until they grow real feathers, usually 6 to 8 weeks. In nature, a broody hen does this job: chicks tuck under her body to warm up, then pop out to eat and explore. A brooder recreates that pattern with a heat source the chicks can move toward or away from as needed.
Day-old chicks can't regulate their own body temperature. Down feathers don't insulate the way adult feathers do, so a chick that gets chilled stops eating, gets weak, and can die within hours. According to the University of Missouri Extension, proper brooding temperature is the single most important factor in early chick survival.
If you hatched your own eggs in an incubator, chicks move to the brooder once they're dry and fluffed, usually 24 hours after hatch. Mail-order and feed store chicks go straight in on arrival.
Choosing a Brooder Box: 5 Options Compared
The container matters less than people think. It needs to block drafts, hold bedding, keep chicks in, and survive getting dirty. Here's what actually works:
1. Plastic storage tote (best for first-timers). A 40-50 gallon tote costs about $15, wipes clean, and handles 4-6 chicks for the first few weeks. The downside is size: chicks outgrow it fast, and a heat lamp can melt the rim if it's clamped too close. Pair a tote with a brooder plate and you've got the cheapest safe setup going.
2. Galvanized stock tank. The classic farm option. A 100-gallon tank handles 10-15 chicks, can't melt or burn, and the smooth walls keep predators and escapees in check. Used ones show up cheap at farm sales. This is what I use now.
3. Cardboard box or appliance box. Free and perfectly fine in a pinch. Tape two boxes together as chicks grow. The catch: cardboard soaks up spilled water and droppings, so plan to replace it weekly and never use a heat lamp near it. Brooder plate only.
4. Dog crate or rabbit hutch. Works if you zip-tie cardboard around the lower walls to block drafts and keep chicks from slipping through the bars. Good ventilation, easy to clean, and you probably already own one.
5. Purpose-built brooder kit. Companies sell complete brooder kits with panels, heat, feeder, and waterer (brooder kits on Amazon). They're convenient and expandable, but you're paying $80-150 for what a tote and brooder plate do for half that. Worth it if you'll brood chicks every spring.
Whatever you pick, the walls need to be at least 12 inches high, 18 is better. Chicks start testing their wings around week 2, and by week 4 they'll fly out of anything short. A piece of hardware cloth or window screen laid over the top solves that and keeps curious cats out.
How Big Should Your Brooder Be?
Plan on half a square foot per chick for weeks 1-4, then a full square foot per chick from weeks 4-8 (University of Missouri Extension).
| Chicks | Weeks 1-4 | Weeks 4-8 |
|---|---|---|
| 4 | 2 sq ft | 4 sq ft |
| 6 | 3 sq ft | 6 sq ft |
| 10 | 5 sq ft | 10 sq ft |
| 15 | 7.5 sq ft | 15 sq ft |
Those are minimums. More room is always better, and crowding is the root cause of most brooder problems: pasty butt spreads, weaker chicks get trampled near the heat, and picking (chicks pecking each other) starts. If you see chicks standing on top of each other anywhere but under the heat source, they need more space.
A common play: start 6 chicks in a 50-gallon tote, then move them to a kiddie pool with a cardboard wall ring or a sectioned-off corner of the garage at week 3 or 4. If you're still deciding how many birds to get, my guide on how many chickens a beginner should start with walks through the math.
Heat Source: Brooder Plate vs Heat Lamp
This is the most important purchase decision in your whole setup, so let's settle it.
Brooder plates (radiant heat plates) are the better choice for almost everyone. A brooder plate is a flat heated panel on adjustable legs. Chicks duck underneath to warm up, exactly like they would under a hen, then come out to eat and play. Plates like the Brinsea EcoGlow or similar radiant plates run on 12-22 watts, can't realistically start a fire, and let the room stay at normal temperature so chicks feather out faster and sleep through real day/night cycles. For specific model picks across sizes and price tiers, see our guide to the best brooder heat plates for baby chicks.
Heat lamps work but demand respect. The traditional 250-watt red bulb in a clamp reflector heats a bigger area and costs less upfront ($15-25 versus $40-70 for a plate). It's the right call for large batches (15+ chicks) or brooding in a cold barn where a plate can't keep up. But heat lamps cause coop and garage fires every single year, almost always because the clamp failed. If you use one:
- •Never trust the clamp alone. Secure the lamp with a chain or wire from two separate points.
- •Keep the bulb 18+ inches from bedding and anything flammable.
- •Use a ceramic socket rated for 250W, and a red bulb (white light stresses chicks and triggers picking).
- •Check the guard and bulb tightness every day.
I compared specific models in my heat lamps and coop heaters guide if you want product details.
Skip these entirely: space heaters pointed at the brooder, heating pads not rated for animals, and hot water bottles (they go cold at 2 AM). The Penn State Extension poultry team recommends checking any brooder heat setup with a thermometer at chick height rather than guessing, and that goes double for improvised heat.
Brooder Temperature Chart
Start at 95F directly under the heat source during week one, then drop 5 degrees per week until the brooder matches the outside temperature or the chicks are fully feathered (University of Missouri Extension).
| Age | Temp Under Heat | What's Happening |
|---|---|---|
| Week 1 | 95F | Beak dipping, learning to eat and drink |
| Week 2 | 90F | Wing feathers coming in |
| Week 3 | 85F | Mini dust baths, perching attempts |
| Week 4 | 80F | Most of body feathering out |
| Week 5 | 75F | Heat often only needed at night |
| Week 6 | 70F | Fully feathered breeds can lose heat |
| Weeks 7-8 | Ambient | Transition to the coop |
Two details people miss. First, that temperature applies under the heat source, not the whole brooder. The far end should be 10-15 degrees cooler so chicks can self-regulate. Second, raise a heat lamp a couple of inches each week to drop temperature; with a brooder plate, raise the legs so chicks still brush against it when standing.
Put a cheap brooder thermometer at chick height under the heat. Don't rely on the lamp's distance or the plate's setting alone.
Bedding: What to Use and What to Avoid
Use pine shavings. Two to three inches of large-flake pine shavings is the standard for good reason: absorbent, cheap, low dust, and chicks can't eat enough of it to matter. A compressed bale costs about $7 at any feed store and lasts a small brooder for weeks.
For the first 2-3 days only, lay paper towels over the shavings. Brand-new chicks can't tell shavings from food, and paper towels give them a grippy surface while they learn where the feeder is. Sprinkle a little starter feed on the towels to help them figure it out.
Avoid these:
- •Newspaper or any slick surface. Causes spraddle leg, a deformity where the legs splay sideways because the chick can't grip. Often permanent.
- •Cedar shavings. The aromatic oils damage chicks' respiratory systems.
- •Sand in week one. Chicks eat it and get impacted crops. Fine after a few weeks, risky early.
- •Hay or straw. Not absorbent, mats down, molds fast in a warm humid brooder.
Spot-clean wet bedding daily (it's always worst around the waterer) and do a full change weekly. Damp bedding plus brooder warmth is the exact recipe for coccidiosis, the number one killer of brooder-age chicks (Merck Veterinary Manual). For the long view on bedding choices once birds hit the coop, see my pine shavings vs straw vs sand comparison.
Feeders and Waterers
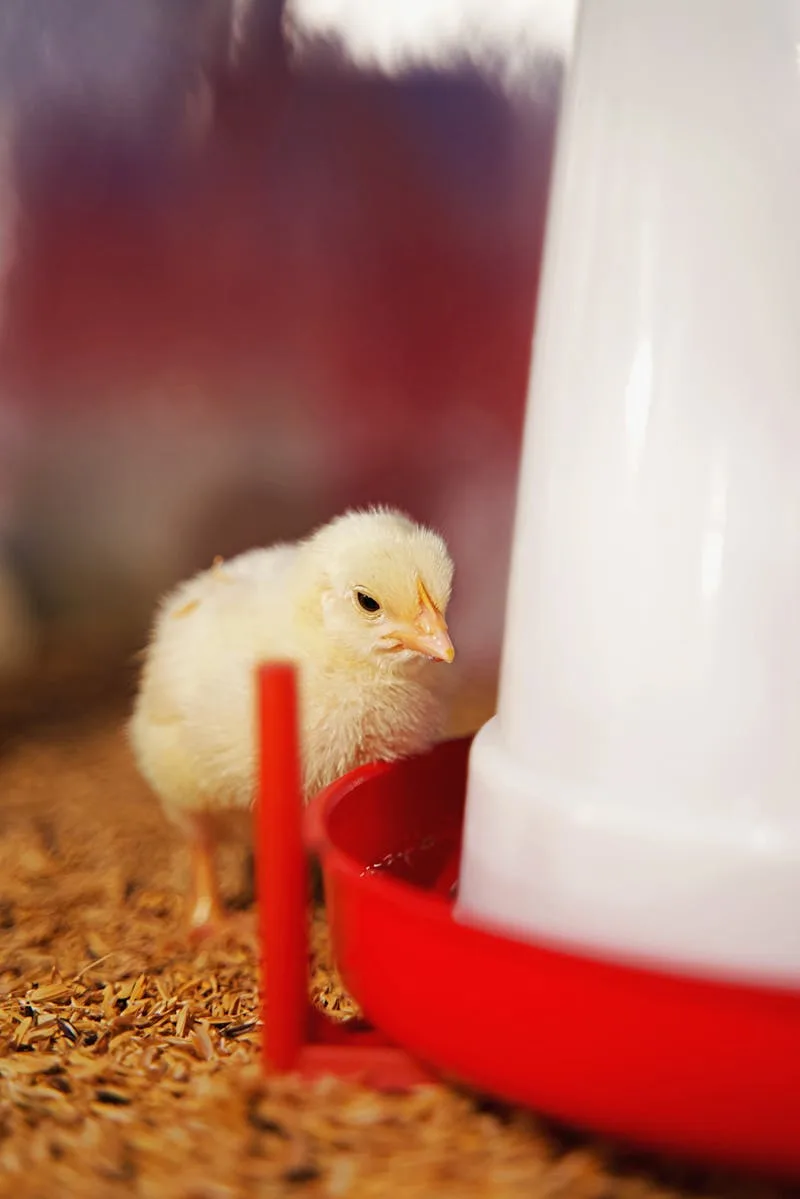
Chicks need feed and water available at all times, served in containers they can't drown in, roost on, or fill with shavings.
Waterer: A 1-quart screw-on chick waterer with the narrow red trough is the standard, and it's the right tool. Open bowls drown chicks; it happens fast and it's miserable. If your waterer trough seems deep, drop clean pebbles or marbles in it for the first week. Raise the waterer on a brick or paver as chicks grow so it sits level with their backs, which keeps shavings out.
Feeder: Use an actual chick feeder, either the round screw-on base with feed holes or the trough style with a spinner bar. Both stop chicks from standing in their food and pooping in it, which they will absolutely do given any chance. A chick feeder and waterer kit costs under $15 for both pieces.
Placement matters: feed and water go at the cool end of the brooder, away from the heat source. Heat near the waterer breeds bacteria, and chicks naturally move between warm rest and cool feeding zones. Feed chick starter (18-20% protein) from day one; medicated starter adds coccidiosis protection unless your chicks were vaccinated for it. Adding poultry electrolytes and probiotics to the water for the first few days helps shipped chicks bounce back from transit stress.
For grown-up equipment down the road, my feeders and waterers guide covers the full-size options.
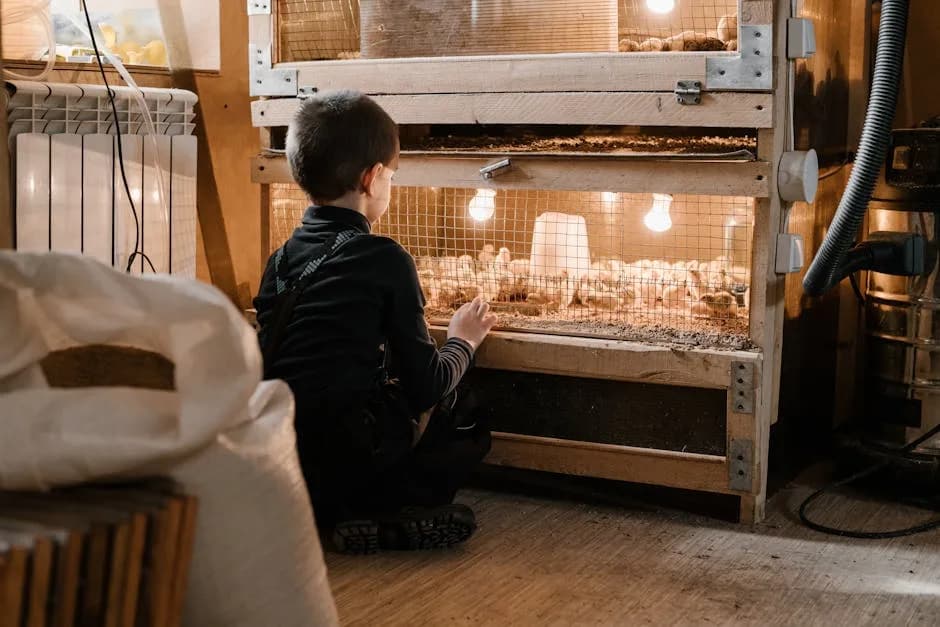
Where to Put Your Brooder
The ideal brooder location is warm-ish, draft-free, predator-proof, and somewhere you'll walk past several times a day. In practice that means:
- •Garage or mudroom (most popular). Stable temperature, easy power access, contains the dust. Just confirm no car exhaust reaches the brooder.
- •Spare bathroom or laundry room. Great for the first 2-3 weeks. Be warned: around week 3, brooders produce a shocking amount of fine dander dust that coats every surface in the room. Most people regret in-house brooding by week 5.
- •Basement. Works well with a brooder plate. Cold concrete floors steal heat, so set the brooder on a pallet or foam board.
- •Inside the coop. Honestly great if you have power out there and the coop is secure. Section off a corner, brood as normal, and integration with the outdoors happens naturally. If you're still building, size the coop with my coop size calculator guide before chicks outgrow the brooder.
Wherever it goes, it must be protected from dogs, cats, raccoons, and snakes. A determined house cat can clear a 12-inch tote wall without a running start. Use a secured screen top, always.
Setting Up Your Brooder: Step by Step
Do this 24 hours before chicks arrive, not the morning of.
- •Place the container in its spot, off cold concrete, away from drafts and windows.
- •Set up heat. Brooder plate at one end, legs at their lowest setting. Or heat lamp chained (not just clamped) 18 inches above the bedding at one end.
- •Add bedding. 2-3 inches of pine shavings, paper towels on top for the first few days.
- •Place feeder and waterer at the cool end. Fill both.
- •Add the thermometer at chick height under the heat source.
- •Run it overnight. Verify 95F under the heat and 75-80F at the cool end. Adjust lamp height or plate legs until it holds steady.
- •Cover the top with hardware cloth or a screen, weighted at the corners.
- •On arrival day, dip each chick's beak into the water as you place it in the brooder. They learn to drink by doing, and a chick that doesn't find water in the first day is in trouble.
From there, the routine is simple: check feed, water, and chick behavior morning and night, spot-clean bedding daily, and drop the temperature 5 degrees each week. My week-by-week chick raising guide covers exactly what to expect each week through coop day.
Reading Chick Behavior: Your Built-In Thermometer
Forget the thermometer for a second. The chicks themselves tell you whether the brooder is right, and they're more accurate than any gauge:
- •Piled in a tight clump under the heat, peeping loudly: too cold. Lower the lamp or plate.
- •Pressed against the far walls, panting, wings spread: too hot. Raise the heat source.
- •Clumped on one side away from the heat: there's a draft. Find it and block it.
- •Spread evenly, some eating, some sleeping, some scratching around, quiet contented peeping: perfect. Change nothing.
Loud, constant, distressed cheeping is always a signal something's wrong: cold, hunger, thirst, or a chick stuck somewhere. A happy brooder is a quiet brooder. Check on any chick that sits puffed up with closed eyes while the others run around; my guide to sick chicken symptoms covers the warning signs that apply to chicks too.
When Chicks Outgrow the Brooder
Chicks are ready to leave the brooder when they're fully feathered, usually 6-8 weeks old, and outdoor temperatures stay above roughly 50F at night. Feathered-out birds handle cold far better than people expect.
Transition gradually if you can. From week 4 or 5 onward, give chicks supervised outdoor field trips in a secure pen on warm afternoons. By week 6, fully feathered chicks can usually stay out all day and come in at night. By weeks 7-8, they move to the coop full time. If adult birds already live there, don't just toss the youngsters in; use the see-but-don't-touch method in my guide on introducing new chickens to a flock.
Clean the empty brooder with a 1:10 bleach solution, dry it completely, and store it. It'll be ready for next spring, because there's always a next spring.
Common Brooder Mistakes
After years of brooding (and a few hard lessons), these are the failures I see most:
- •Heating the whole brooder evenly. Chicks need a warm zone and a cool zone. A uniformly hot box gives them nowhere to escape to, and overheating kills as surely as chilling.
- •Trusting the heat lamp clamp. Clamps fail. Chain the lamp from two points or use a plate. This is a fire-prevention rule, not a suggestion.
- •Too small a box. That cute 20-gallon tote is overcrowded by week 3. Start bigger than you think you need or have the upgrade ready.
- •Newspaper bedding. Causes spraddle leg. Pine shavings with paper towels on top for the first days, always.
- •Open water dishes. Chicks drown in an inch of water. Use a chick waterer.
- •Skipping the 24-hour test run. Dialing in temperature with a box of live, chilling chicks is stressful for everyone. Test first.
- •Buying chicks before the brooder is ready. Feed store chick displays are powerful. Set up the brooder first, then go to the store. If you haven't picked birds yet, start with my best breeds for beginners and the beginner's guide to backyard chickens.
Frequently Asked Questions
What temperature should a chicken brooder be?
95F directly under the heat source for week one, then 5 degrees less each week: 90F in week 2, 85F in week 3, and so on until the brooder matches ambient temperature or the chicks are fully feathered around week 6. The far end of the brooder should always be 10-15 degrees cooler so chicks can self-regulate.
How long do chicks stay in a brooder?
Six to eight weeks for most breeds, until they're fully feathered and nights stay above about 50F. Fast-feathering breeds like Leghorns may be ready closer to 5-6 weeks; slow-feathering and bantam breeds can take the full 8.
Is a brooder plate better than a heat lamp?
For most backyard flocks, yes. Brooder plates use a fraction of the electricity, carry almost no fire risk, and mimic a mother hen so chicks develop natural sleep cycles. Heat lamps still make sense for big batches (15+ chicks) or brooding in very cold spaces, but they must be secured with chain, never just the clamp.
What do you put on the bottom of a brooder?
Two to three inches of large-flake pine shavings, with paper towels laid on top for the first 2-3 days so new chicks get traction and learn what's food. Never use newspaper (causes spraddle leg), cedar shavings (respiratory damage), or sand in the first weeks (impaction risk).
Can you keep a brooder outside?
Yes, if it's predator-proof, draft-free, and the heat source can hold temperature. A sectioned-off corner inside a secure coop with power works well and makes the coop transition easier. Uninsulated outdoor brooders in early spring may need a heat lamp rather than a plate to keep up in cold snaps.
How big should a brooder be for 6 chicks?
At least 3 square feet for weeks 1-4, then 6 square feet from week 4 until coop day. A 50-gallon plastic tote covers the early weeks; plan to expand into a kiddie pool, stock tank, or penned-off floor space as they grow.
Do chicks need light at night in the brooder?
No. If you use a brooder plate, chicks sleep in natural darkness just as they would under a hen, and they rest better for it. If you run a heat lamp, use a red bulb: it provides warmth without the constant bright light that disrupts sleep and encourages chicks to peck each other.
When can chicks go outside?
Short supervised visits on warm (65F+) calm days can start around weeks 3-4. Fully feathered chicks, usually 6 weeks and older, can live outside full time once nighttime temperatures hold above roughly 50F. Transition gradually over a week rather than moving them out cold turkey.
Sources:
- •University of Missouri Extension: Brooding and Growing Chicks
- •Penn State Extension: Poultry Resources
- •Merck Veterinary Manual: Poultry
- •Poultry Extension (eXtension Foundation)
This article contains affiliate links. As an Amazon Associate, FlockGuide earns from qualifying purchases at no extra cost to you.
Related Guides
Raising Chicks: Week-by-Week Guide to Coop Day
Raising baby chicks week by week: brooder setup, temperature charts, feeding tips, and milestones through their first 8 weeks.
Beginner GuidesBroody Hen: Signs and How to Break It (or Hatch)
A broody hen sits on the nest and stops laying. Learn the signs, how to safely break broodiness in a few days, and when to let her hatch chicks.
Beginner GuidesHow Much Money Can You Make Selling Eggs? Real 2026 Math
Real profit numbers for selling backyard eggs: revenue and costs at 6 to 50 hens, 2026 prices by sales channel, and what actually eats your margin.
Beginner GuidesHow to Candle Eggs: A Day-by-Day Hatching Guide
Learn how to candle chicken eggs step by step. What to look for on day 7, 14, and 18, how to spot a quitter, and the gear you need. Beginner friendly.