Raising Chicks: Week-by-Week Guide to Coop Day
Raising baby chicks week by week: brooder setup, temperature charts, feeding tips, and milestones through their first 8 weeks.
Raising Chicks: Your Week-by-Week Guide from Day 1 to Coop Day
So you've got baby chicks on the way. Maybe you hatched them yourself in an incubator, maybe you ordered from a hatchery, maybe you're picking them up at the feed store this weekend. Either way, those first few weeks are critical. Chicks are surprisingly hardy little creatures, but they do need the right setup to thrive.
This guide walks you through each week from day one through week eight, when most chicks are ready to transition to their outdoor coop. You'll know exactly what to expect, what to watch for, and when to make changes.
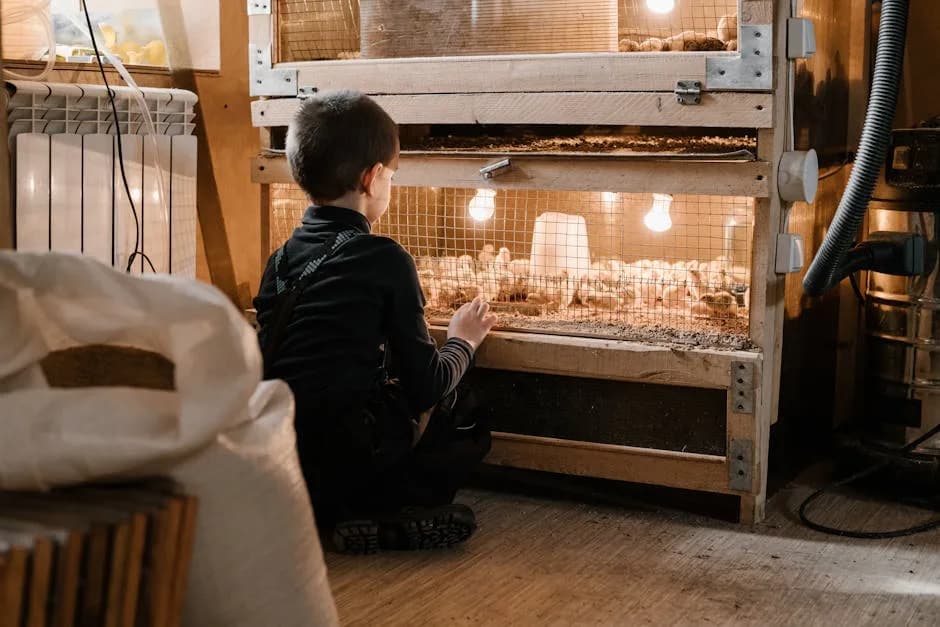
Before the Chicks Arrive: Setting Up Your Brooder
Don't wait until chick day to scramble for supplies. Get your brooder set up and warmed at least 24 hours before your chicks arrive. Here's what you'll need:
The Brooder Box Any container that's draft-free, easy to clean, and tall enough that chicks can't hop out. Popular options include:
- •Large plastic storage totes (cheapest option for small flocks)
- •Stock tanks or galvanized tubs
- •Cardboard boxes (temporary, but they work in a pinch)
- •Purpose-built brooder kits
For space, plan on about half a square foot per chick for the first four weeks, then one square foot per chick from weeks four through eight (University of Missouri Extension). So for six chicks, start with a container that's at least 3 square feet and plan to upgrade around week four.
Heat Source You've got two main options:
- •
Heat lamps, the traditional choice. Use a 250-watt red or infrared bulb. Red light is better because it reduces pecking and lets chicks sleep. The downside? Heat lamps are a fire risk. Secure them with clamps AND a backup chain or wire. Never hang a heat lamp by its cord alone.
- •
Brooder heat plates, the safer modern option. These radiant panels sit on adjustable legs, and chicks huddle underneath like they would under a mother hen. No fire risk, lower energy costs, and chicks seem to love them. The Brinsea EcoGlow is the gold standard, though there are plenty of good budget options too.
Check Price: Brinsea EcoGlow Brooder on Amazon
Bedding Pine shavings are the go-to. They're absorbent, affordable, and easy to clean. Avoid cedar shavings (the oils can irritate chicks' respiratory systems) and newspaper (too slippery, can cause leg problems called "splayed leg"). According to the University of Missouri Extension, hardwood shavings should also be avoided because they can harbor mold that causes serious respiratory infections.
Lay down 2-3 inches of pine shavings. For the first day or two, some people cover the shavings with paper towels so tiny chicks can find their food more easily.
Feeder and Waterer A basic chick feeder and waterer from the feed store will run you a few dollars each. Get the kind designed for chicks, with narrow openings that prevent them from sitting in their food or water. As one Reddit user in r/BackYardChickens put it: "Get a bigger waterer than you think you need. Raise it a little on top of something sturdy so that the water line is up slightly" (source). This helps keep the water cleaner longer.
Check Price: Chick Feeder and Waterer Set on Amazon
Feed Chick starter feed with 18-20% protein. That's it for the first 8 weeks. Don't give layer feed to chicks; the extra calcium can damage their kidneys. If you want to offer treats after the first week or two, provide chick grit so they can digest them properly. For more on feeding, check out our complete feeding guide.
The Temperature Chart
This is the most important thing to get right. Chicks can't regulate their own body temperature for the first several weeks. Here's the schedule, based on guidelines from the University of New Hampshire Extension and University of Florida IFAS:
| Week | Temperature | What to Watch For |
|---|---|---|
| Week 1 | 95°F (35°C) | Chicks spread evenly = perfect. Huddled under lamp = too cold. Panting at edges = too hot. |
| Week 2 | 90°F (32°C) | Drop 5°F. Chicks start exploring more. |
| Week 3 | 85°F (29°C) | Wing feathers coming in. Still need heat. |
| Week 4 | 80°F (27°C) | Getting feathery. More active and adventurous. |
| Week 5 | 75°F (24°C) | Almost fully feathered. Starting to look like real chickens. |
| Week 6 | 70°F (21°C) | Can handle room temperature. Ready to start short outdoor trips. |
| Week 7-8 | 65-70°F (18-21°C) | Fully feathered. Ready for coop transition if weather is mild. |
The simple rule: Start at 95°F for week one, then drop 5°F each week. By week six, most chicks don't need supplemental heat anymore.
Pro tip: Don't obsess over the thermometer. Watch the chicks instead. If they're spread out comfortably and moving around, the temperature is fine. If they're piled on top of each other under the heat source, it's too cold. If they're pressed against the far walls panting, it's too hot.
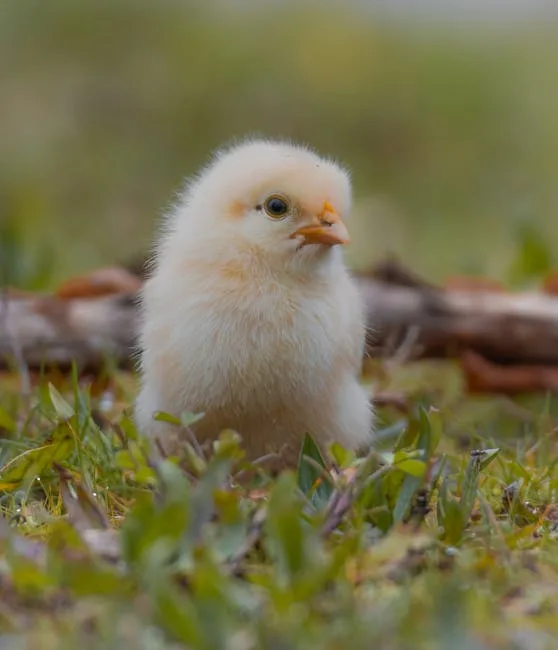
Week 1: The Arrival
This is the most hands-on week. Your chicks just went through a stressful journey, whether from a hatchery shipping box or a feed store bin.
Day 1 Checklist:
- •Dip each chick's beak in the water so they know where to drink. Don't force water down their throat; just a gentle dip. As experienced chicken keepers on Reddit note, chicks can aspirate very easily, so just let them figure it out after that first dip (source).
- •Show them the food by tapping the feeder with your finger. The tapping sound mimics a mother hen pecking and draws their attention.
- •Make sure the brooder is 95°F at chick level.
- •Check that there are no drafts, but the brooder isn't sealed shut either. Ventilation matters.
What to expect: Chicks will sleep a LOT. They'll eat, drink, peep, run around for a bit, then crash. This is completely normal. They might also sleep in weird positions that look alarming. Flat on their face, legs stretched out behind them. That's fine. Chicks are just dramatic sleepers.
Watch for pasty butt. This is when droppings stick to the vent (their back end) and harden, blocking things up. It's common in shipped chicks due to stress. Check every chick twice a day. If you see buildup, gently clean it with a warm, damp cloth. Don't pull dried droppings off; you can tear the skin.
Feeding: Chick starter crumble, available 24/7. Clean water, changed at least twice daily (they'll poop in it constantly).
Optional first week supplement: A pinch of electrolyte and probiotic powder in the water for the first 3 to 5 days helps chicks recover from shipping stress and establish gut bacteria. See our chicken probiotics and electrolytes guide for product picks. After the first week, plain water is correct.
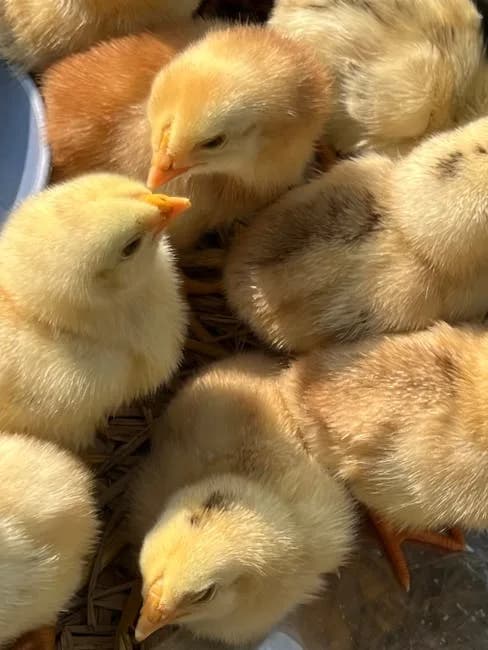
Week 2: Finding Their Feet
Temperature drops to 90°F. You'll notice the chicks are more active, running around, play-fighting with each other, and discovering their wings. Don't be surprised if you see tiny wing feathers starting to poke through.
This week:
- •They'll start perching on the edge of their feeder. Add a small perch or stick an inch off the ground if you want to encourage this.
- •Dust bathing behavior might start. You'll see chicks flopping around in the shavings. It's instinct, not a seizure.
- •Keep checking for pasty butt, though it usually clears up by the end of this week.
If you're new to chickens, this is a great time to read up on how many chickens you should start with and make sure your coop plans match your flock size.
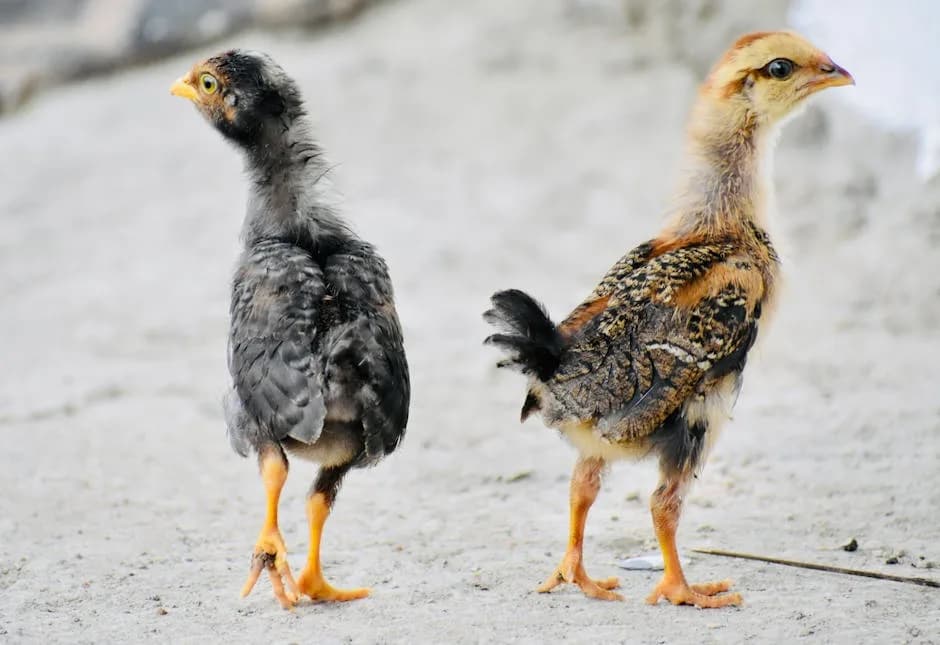
Week 3: The "Awkward Teenager" Phase Begins
Temperature: 85°F. Wing feathers are really coming in now, and your chicks are starting to look a little... ridiculous. Part fluff, part feather, all attitude. Welcome to the awkward phase.
This week:
- •Chicks are much more active and will try to fly. Make sure your brooder walls are high enough (at least 12 inches, 18 is better) or add a screen top.
- •They'll start establishing a pecking order. Some chasing and chest-bumping is normal.
- •You can start offering tiny treats: a few mealworms, finely chopped greens, or a small amount of scrambled egg (yes, really). Always provide chick grit if you're giving anything besides starter feed.
- •Handling them daily helps with socialization. Calm, gentle handling now means friendlier adult chickens later.
Week 4: Growing Fast
Temperature: 80°F. They're looking more like miniature chickens and less like cotton balls. Body feathers are filling in, though they'll still have some fluffy patches.
This week:
- •Space is getting tight if you started in a small tote. Plan to upgrade to a larger brooder or expand the current one. Remember: one square foot per chick from here on.
- •They're eating and drinking noticeably more. Make sure feeders and waterers are keeping up.
- •If it's warm outside (70°F+), you can give them supervised outdoor time in a small enclosed pen. Even 15-20 minutes of sunshine and grass is great enrichment. Bring them back inside before they get cold.
Week 5: Almost There
Temperature: 75°F. Most breeds are well-feathered by now. They look like awkward miniature versions of adult chickens.
This week:
- •They're strong flyers at this age. A brooder lid is pretty much mandatory unless you enjoy chasing chicks around the house.
- •Outdoor time can be longer on warm days. Watch for signs of cold (huddling, puffed feathers) and bring them in if needed.
- •If you haven't already, start thinking about coop setup. They'll be ready to move out soon.
Week 6: Transition Time
Temperature: 70°F. At this point, many chicks don't need supplemental heat unless your house is unusually cold. Try turning off the heat source during the day and see how they do.
This week:
- •If nighttime temperatures are above 60°F, they can start sleeping without heat.
- •Increase outdoor time. Let them explore, scratch in the dirt, eat bugs.
- •Switch to a larger feeder and waterer if you haven't already. They're drinking a lot more now.
- •Start the coop transition plan. Put their food and water in the coop during the day so they associate it with good things.
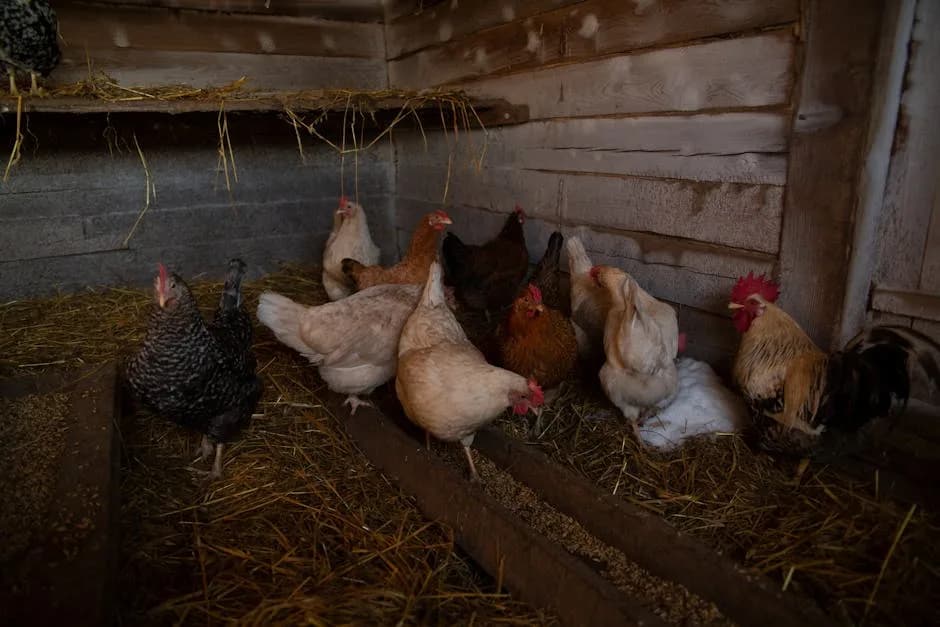
Weeks 7-8: Coop Day
Your chicks are fully feathered and ready for the great outdoors. This is the big move.
Moving to the coop:
- •Wait for a stretch of mild weather if possible. Don't move them out during a cold snap.
- •Lock them in the coop (not the run) for the first 2-3 days. This teaches them that the coop is "home" and where they should roost at night.
- •After a few days, open the door to the run and let them explore. They should return to the coop at dusk on their own. If they don't, gently place them inside at dark for a few nights until they get the routine.
- •Make sure the coop is predator-proof. Hardware cloth, not chicken wire. Secure latches. No gaps bigger than half an inch.
If you're introducing them to an existing flock, that's a whole different process. The general rule is to wait until chicks are close to the same size as your adults (usually 12-16 weeks) and introduce them gradually. We'll cover that in detail in a future article.
Feed transition: Keep them on chick starter (18-20% protein) until they're about 16-18 weeks old, then switch to layer feed when they're approaching point-of-lay age. If you have a mixed-age flock, an all-flock feed with oyster shell on the side works well.
Essential Gear Checklist
Here's a quick shopping list for everything you'll need:
Must-Have:
- •Brooder container (storage tote, stock tank, or brooder kit)
- •Heat source (heat plate strongly recommended over heat lamps)
- •Chick feeder and waterer
- •Chick starter feed (18-20% protein)
- •Pine shavings bedding
- •Thermometer
Nice to Have:
- •Chick grit (needed if offering treats)
- •Electrolyte/vitamin supplement for water (good for shipped chicks)
- •Small perch or roost bar
- •Brooder lid or screen
Check Price: Complete Chick Brooder Starter Kit on Amazon
Common Mistakes (and How to Avoid Them)
Using a heat lamp without proper safety precautions. Heat lamps cause barn and house fires every year. If you go the heat lamp route, secure it with clamps AND a backup chain. Better yet, use a brooder heat plate instead.
Keeping it too hot (or too cold). Watch the chicks, not just the thermometer. Their behavior tells you everything.
Not checking for pasty butt. It's gross, but it can kill a chick if left untreated. Check twice daily for the first two weeks.
Giving treats too early. Stick to chick starter for at least the first week. After that, treats should be tiny and occasional, with grit available.
Overcrowding the brooder. Chicks grow shockingly fast. What seems like plenty of space at week one is cramped by week three. Plan ahead.
Skipping the coop lockdown period. Those first 2-3 days locked in the coop teach your chickens where home is. Skip this and you'll spend your evenings chasing chickens who want to sleep in the bushes.
Quick Reference: Week-by-Week Milestones
- •Week 1: Sleeping, eating, drinking. Watch for pasty butt. 95°F.
- •Week 2: Wing feathers appearing. More active. Play fighting. 90°F.
- •Week 3: Trying to fly. Awkward half-fluff phase. Can start tiny treats. 85°F.
- •Week 4: Body feathers filling in. Need more space. Supervised outdoor time OK. 80°F.
- •Week 5: Strong flyers. Looking like mini chickens. Longer outdoor sessions. 75°F.
- •Week 6: Try turning off heat during the day. Start coop transition. 70°F.
- •Week 7-8: Fully feathered. Move to the coop! 65-70°F.
You've Got This
Raising chicks isn't complicated, but it does require attention, especially in those first couple of weeks. Keep them warm, fed, and clean, and they'll reward you with healthy, friendly chickens that you raised from day one.
If you're still in the planning phase, check out our beginner's guide to raising backyard chickens for the full picture, from choosing breeds to collecting your first eggs.
Frequently Asked Questions
What temperature should a brooder be for baby chicks?
Start at 95°F for the first week, then reduce by 5 degrees each week until chicks are fully feathered around 6 weeks old. Use a thermometer at chick level to verify. If chicks huddle together, they're too cold. If they spread to the edges, it's too warm.
When can chicks go outside?
Most chicks are ready for the outdoor coop at 6 to 8 weeks old when they're fully feathered. If nighttime temps still drop below 50°F, wait a bit longer or provide supplemental heat in the coop. Start with supervised outdoor time during the day at around 4 weeks.
Do baby chicks need a heat lamp or heat plate?
Both work, but heat plates are safer. Heat lamps cause hundreds of coop fires every year and can overheat chicks. Heat plates mimic a mother hen, letting chicks warm up underneath and move away when they want. They cost a bit more but the safety difference is worth it.
What should I feed baby chicks?
Start with chick starter feed (18 to 20 percent protein) from day one through 8 weeks. Then switch to grower feed (16 percent protein) until they start laying. Medicated starter helps prevent coccidiosis, which is one of the biggest chick killers. Always provide clean water with their feed.
How do I know if my chicks are healthy?
Healthy chicks are active, eating and drinking regularly, and have clear eyes and clean vents. Watch for pasty butt (droppings stuck to the vent), lethargy, hunched posture, or bloody droppings. Catch problems early and you can usually fix them. Check on your chicks at least twice a day.
Affiliate Disclosure: This article contains affiliate links to Amazon. If you buy something through these links, we earn a small commission at no extra cost to you. We only recommend products we believe in. Full disclosure.
Related Guides
Chicken Brooder Setup: The Complete Guide for Baby Chicks
Set up a chicken brooder the right way: box options, brooder plate vs heat lamp, temperature chart, bedding, and space requirements for baby chicks.
Beginner GuidesHow to Candle Eggs: A Day-by-Day Hatching Guide
Learn how to candle chicken eggs step by step. What to look for on day 7, 14, and 18, how to spot a quitter, and the gear you need. Beginner friendly.
Beginner GuidesHow to Hatch Chicken Eggs: Complete 21-Day Incubation Guide
Hatch chicken eggs at home with this day-by-day incubation guide. Covers temperature, humidity, turning, candling, and what to do on hatch day.
Beginner GuidesHow Much Money Can You Make Selling Eggs? Real 2026 Math
Real profit numbers for selling backyard eggs: revenue and costs at 6 to 50 hens, 2026 prices by sales channel, and what actually eats your margin.