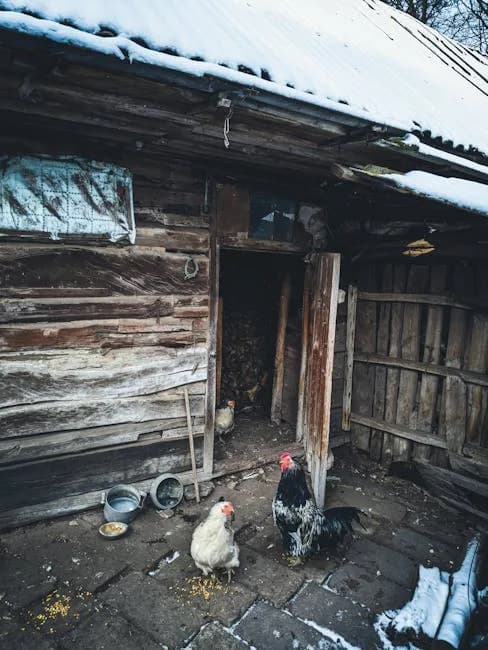
Chicken Coop Insulation: How to Winterize a Coop (2026)
Insulate and winterize a chicken coop the way extension services advise: seal drafts, keep the vents, cover insulation, wrap the run, heat only below 35°F.
Researched from university extension, USDA, and veterinary sources. How we research.
Chickens do not need a warm coop. They need a dry, draft-free one with fresh air, and most of the damage done in winter comes from getting that backwards: sealing a coop so tight that the moisture from six birds and their droppings condenses on the walls and freezes to their combs. This guide walks through winterizing a coop in the order that matters, with what to buy at each step and what to skip.
The numbers here come from the University of Minnesota Extension's cold-weather guidance and the University of Arkansas poultry veterinarians, and every product was checked in stock on September 5, 2026.
What You'll Learn
- •What cold actually does to chickens
- •Step 1: Seal drafts, not vents
- •Step 2: Keep the ventilation
- •Step 3: Insulate the walls and ceiling
- •Step 4: Wrap the run
- •Step 5: Deep litter and wooden roosts
- •Step 6: Water that stays liquid
- •Step 7: A thermometer, then maybe a heater
- •Winterizing a prefab coop
- •What to budget
- •FAQ
What Cold Actually Does to Chickens
A chicken runs at about 106°F and holds that temperature comfortably when the air is between 60°F and 75°F. Below that it fluffs its feathers, trapping air against its body, and burns more feed to stay warm. Heavy breeds like Plymouth Rocks, Wyandottes, Ameraucanas, and Orpingtons do this well into single digits. Small, lightly feathered, or large-combed birds, and any bird that is wet, do not.
The two real winter injuries are frostbite and respiratory trouble, and both come from moisture, not cold. Chicken manure is about 70 percent water. Six hens breathing and pooping overnight in a sealed 4 by 6 coop put pints of water into the air, and on a cold night that water condenses on the walls, the roof, and the birds. The University of Minnesota Extension puts it plainly: high moisture combined with cold leads to condensation, which causes frostbite. Ammonia builds up the same way and damages lungs.
So the goal of winterizing is not warmth. It is to stop the wind hitting the birds while letting the moist air out over their heads. Everything below serves that.
Step 1: Seal Drafts, Not Vents
A draft is moving air at roost height. A vent is an opening above the birds. Winterizing starts by telling them apart.
Go into the coop on a windy day and hold a hand at roost height along every wall and around the door. Gaps between boards, an ill-fitting pop door, a rotten sill, and knotholes are drafts. Seal them:
- •Foam weatherstrip around the people door and the nest box lids. Frost King sponge tape at about $5 for 10 feet does most coops; the thinner R338H at $3 fits tighter lids.
- •Exterior caulk or scrap lath over gaps between siding boards.
- •Hardware cloth over holes at the floor line. Minnesota's advice is that sealing these keeps rodents out as well as cold, and a rat that moves into an insulated coop in December is a worse problem than the cold was.
Leave every opening above the birds alone for now. That is the next step.
Step 2: Keep the Ventilation
This is where most winterizing goes wrong. A coop needs air exchange in January as much as in July; the University of Arkansas's poultry veterinarian calls it "the tricky part." The exchange removes moisture and ammonia, and the openings that do it belong high on the walls or in the roof, above roost height, so that air moves out over the birds rather than across them.
The test is simple: if you smell ammonia when you open the door in the morning, or see moisture on the inside of the windows or frost on the underside of the roof, you need more ventilation and a manure cleanup, not less air. Minnesota's guidance is a roof vent or high wall vents, and a droppings board or tray under the roosts so most of the moisture goes out with the morning scrape instead of into the air.
If a high vent faces the prevailing wind and drives air straight down onto the roost, the Arkansas guidance is to hang burlap over that opening rather than close it: it slows the wind and still breathes. A vent on the lee side stays fully open.
Step 3: Insulate the Walls and Ceiling
Insulation is optional in most of the country and worth doing in the northern tier, in high-wind sites, and on thin prefab coops. Two rules from the extension guidance decide how you do it:
- •Cover it. Chickens peck and scratch at foam and foil, and rodents nest in it. Insulation goes between studs or against the wall and then gets covered with plywood, OSB, or paneling. Exposed foam board in a coop is a mistake you will find in pieces on the floor.
- •Insulate after you have fixed drafts and confirmed the vents. Insulating a leaky coop just makes an expensive leaky coop.
Rigid foam board is the standard for a walk-in coop. Buy 1-inch or 1.5-inch XPS or polyiso sheets at the hardware store, where a 4 by 8 sheet costs $20 to $40; Amazon's foam-board listings are craft-size or garage kits and cost more per square foot. Cut it to fit between studs, tape the seams, and cover it.
Reflective bubble insulation is the right choice for the ceiling and for thin-walled prefab coops where there is no stud cavity. Reflectix 24-inch by 25-foot, about $30 for 50 square feet, or the 48-inch by 10-foot double pack, about $32 for 40 square feet, staples to the underside of a metal or asphalt roof and cuts the radiant loss that makes a thin roof frost inside. It is fiber-free and lightweight. It still needs a cover where birds can reach it.
Skip fiberglass batts. They hold moisture, they are bad for lungs, and rodents love them.
An insulated coop with a stocked roost of heavy birds will sit 10°F to 20°F above the outside air on a still night without any heater. That is the whole point.
Step 4: Wrap the Run
Birds that stay in the coop all day get bored and start pecking each other. A run they can use in January is worth more than a warm coop, and wrapping it is cheap.
Cover the windward two sides and the top with clear plastic, leaving the lee side open for air. Clear matters: birds need the light for laying, and an opaque tarp makes a dark, damp tent.
- •Purpose-made coop covers. The 6 by 10 foot 16-mil clear coop cover, about $43, and the 8 by 12, about $55, come with elastic ties and rope and are thick enough to survive a winter of wind against wire.
- •Greenhouse film for a big run. 6-mil UV-resistant polyethylene, 10 by 25 feet, about $21, covers 250 square feet. It tears more easily than the 16-mil covers, so lath it to the frame rather than relying on ties.
- •A clear tarp with grommets for an odd shape: 10 by 12 heavy-duty clear, about $31.
Lay a bale of straw in the wrapped run and the birds will spend the day in it. Snow on bare feet is what keeps them inside; straw fixes that.
Step 5: Deep Litter and Wooden Roosts
Two changes inside the coop do more for warmth than any insulation.
Deep litter. Instead of stripping the floor weekly, start the season with 4 to 6 inches of pine shavings and add a few inches every week or two, turning it so the droppings mix in. By midwinter it is a foot deep and composting, and a composting floor gives off a little heat and a lot of insulation. It works only with ventilation above it; a sealed coop with deep litter is an ammonia problem. Our bedding guide covers the method in detail.
Wooden roosts, wide side up. Chickens keep their feet warm by sitting on them. A 2 by 4 laid flat lets the bird cover its toes with its body; a round metal or plastic bar does not, and the extension guidance is specific that metal and plastic roosts hold cold and cause frostbitten toes. Raise the roosts above the nest boxes and off the floor.
Add a droppings board under the roosts, scraped every morning. Minnesota's point is that manure is where the water comes from, and getting it out daily is the cheapest moisture control there is.
Step 6: Water That Stays Liquid
A bird that cannot drink stops eating, and it happens on the first hard freeze. Before that morning, do two things: raise the waterer onto a stand or a chain so bedding stays out of it and the element stays out of the bedding, and switch to a heated waterer or put the fount you own on a heated base. Our heated chicken waterer guide covers the picks; the short version is the Premier 1 All-Season at about $97 or the Farm Innovators HB-60P at about $58, and a heated base at about $50 for a metal fount. Keep a second waterer in the garage for the day the first one freezes or fails.
Step 7: A Thermometer, Then Maybe a Heater
You cannot decide about heat without a number. Minnesota's guidance is to hang thermometers at nest-box height and at the lowest roost, and to add supplemental heat when the coop falls below 35°F at those heights, placed at that same height. A wireless indoor-outdoor thermometer and hygrometer, about $18, puts the coop reading on your kitchen counter, and the humidity number tells you whether your ventilation is working: if the coop reads much wetter than outside, open a vent.
If the coop does drop below 35°F on normal nights, add a radiant panel, not a heat lamp, and put it on a thermostat. A Thermo Cube TC-3, about $17, switches an outlet on at 35°F and off at 45°F, which is exactly the range you want. The panels themselves, and why the classic 250-watt red bulb is the leading cause of coop fires, are in our coop heater guide.
Two cautions from the extension services: use only heaters approved for use around livestock, and treat extension cords as a short-term measure, not a way to power a coop for the winter. If the coop needs power, have an electrician run it.
Winterizing a Prefab Coop
The $200 flat-pack coops most first flocks live in are 1/2-inch fir with poultry wire, and they need the same steps in a smaller package:
- •Weatherstrip the nest-box lid and the cleaning tray slot; those are the drafts.
- •Staple reflective insulation to the underside of the roof panel and cover the walls of the sleeping box with a layer of foam board faced with thin plywood, leaving the vent slots under the eaves open.
- •Wrap the run underneath on the windward sides with a clear cover and put straw on the floor.
- •Move the whole coop against a wall or fence on the north side, out of the wind. Wind chill is the killer of small coops.
- •A small coop with three or four hens rarely needs a heater; the birds heat it themselves once the drafts are gone.
If the coop is on its last winter, our coops under $500 guide and walk-in coop guide cover the replacements.
What to Budget
| Job | Cost |
|---|---|
| Weatherstrip and caulk | $10 to $20 |
| Reflective insulation for the roof | $30 to $65 |
| Foam board for a walk-in coop, from the hardware store | $60 to $160 |
| Plywood or paneling to cover it | $40 to $100 |
| Run cover | $20 to $55 |
| Straw for the run, per bale | $8 to $12 |
| Heated waterer or base | $50 to $97 |
| Thermometer and thermostat plug | $35 |
| Radiant panel heater, if the coop drops below 35°F | $42 to $160 |
A small coop is winterized for under $150 without a heater. A walk-in coop with full insulation runs $300 to $450.
Frequently Asked Questions
Do chicken coops need insulation?
Only in cold regions, high-wind sites, or thin prefab coops. In most of the country a draft-free coop with open vents above the roosts and a full roost of birds stays well above freezing. Insulation helps once drafts are sealed; it does nothing for a leaky coop.
What is the best insulation for a chicken coop?
Rigid foam board covered with plywood for walls with stud cavities, and reflective bubble insulation such as Reflectix stapled under the roof. Both are fiber-free and moisture-resistant. Whatever you use must be covered so birds cannot peck it and rodents cannot nest in it.
Should I close the vents in winter?
No. Close the drafts at bird height and leave the vents above the roosts open. Moisture and ammonia have to leave the coop or the birds get frostbite and respiratory disease. If a vent blasts wind onto the roost, hang burlap over it instead of closing it.
How cold is too cold for chickens?
Heavy, fully feathered breeds handle single digits in a dry, draft-free coop. The extension guidance is to add supplemental heat when the coop itself drops below 35°F at roost height, which in an insulated coop full of birds takes a much colder night than that outside.
Can I heat a chicken coop with a heat lamp?
You can, but a 250-watt heat lamp is the leading cause of coop fires and it lights the coop all night. A flat radiant panel on a thermostat plug is safer, cheaper to run, and dark. See the coop heater guide.
How do I keep the run usable in snow?
Wrap the windward sides and the top in clear plastic, leave the lee side open for air, and put straw on the ground. Birds avoid snow on bare feet, not cold air; give them a dry floor and they will be out all day.
Does deep litter really keep a coop warm?
It adds insulation under the birds and a little heat from composting, and it cuts the weekly cleaning to a monthly one. It needs the vents open above it and dry shavings added regularly. Wet, matted litter is worse than a bare floor.
Winterizing in order: drafts, vents, insulation, run, litter, water, thermometer, and only then a heater. Do the first six and most flocks never need the seventh. For the daily routine once it is cold, see winter chicken care and how to keep chickens warm in winter.
Sources:
- •University of Minnesota Extension. Caring for chickens in cold weather. https://extension.umn.edu/agriculture/animals-and-livestock/poultry/caring-for-chickens-in-cold-weather
- •University of Arkansas Division of Agriculture. Backyard poultry coops prepped for cold still require good ventilation (Dustan Clark, extension poultry veterinarian). https://www.uaex.uada.edu/media-resources/news/2024/january/1-11-2024-ark-cold-backyard-poultry.aspx
- •University of Kentucky Cooperative Extension. Small Flock Poultry. https://poultry.extension.org/
- •Penn State Extension. Poultry housing and equipment. https://extension.psu.edu/animals/poultry
- •Product sizes and prices: Amazon product listings, checked September 5, 2026.
Product prices and availability are accurate as of the date shown and are subject to change. Any price and availability information displayed on Amazon at the time of purchase will apply to the purchase of this product.
Related Guides
Chicken Coop Plans: 8 Free Extension Designs (2026)
Eight free chicken coop plans from extension and USDA archives, each opened and checked: sizes, hen counts, materials lists, and what to update on the old ones.
Beginner GuidesRaising Chicks: Week-by-Week Guide to Coop Day
Raising baby chicks week by week: brooder setup, temperature charts, feeding tips, and milestones through their first 8 weeks.
Beginner GuidesRooster vs Hen: How to Tell the Difference
How to tell a rooster from a hen: comb and wattle size, hackle and saddle feathers, crowing, spurs, and behavior, plus the age each clue appears.
Beginner GuidesDuck Eggs vs Chicken Eggs: Taste, Nutrition, Baking
How duck eggs compare to chicken eggs on size, taste, nutrition, and baking, plus whether raising ducks for eggs is right for your backyard.